Virtual Machine
This page is obsolete. It is kept here for archival purposes, but for an up-to-date version please see the DigiPal Framework wiki on GitHub at https://github.com/kcl-ddh/digipal/wiki/.
Update (21/04/15): Docker is now the recommended way to install the DigiPal framework on your machine. The documentation below is therefore superceded by that found on the DigiPal Docker page.
DigiPal can be used in a local machine we provide which is ready to be used, without any further configuration required.
To run the DigiPal VM, you will first need to download the file we provide, and then download a software called VirtualBox, freely downloadable at https://www.virtualbox.org/, which works on all the platforms. Please make sure to download the latest version. A minimum requirement for running the Virtual Machine is a laptop or desktop computer with minimum 4GB of memory and 2GB of free space available on disk.
DigiPal VM: What is it?
A virtual machine is like a computer running within your computer. The DigiPal VM is a virtual machine which mounts a very basic Linux distribution to run DigiPal. DigiPal is already installed and configured. To use it, you should just open the browser provided (Iron Browser, a Google Chrome's alternative version), and the DigiPal local instance will be opened.
Initial Setup
Downloading the DigiPal VM
You can download the DigiPal VM at the address provide address
Installing the DigiPal VM with VirtualBox
Once VirtualBox is installed in your machine, loading the DigiPal VM is very straightforward.
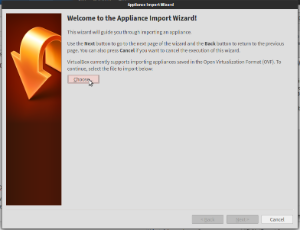
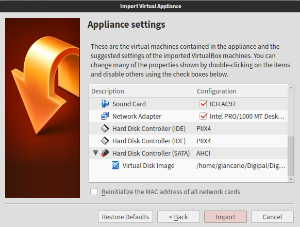
The first thing you need to do is running VirtualBox. Afterwards, from the menu, go to File->Import Appliance. The window will prompt you to choose the file you want to load: that is the file downloaded in the previous step. Afterwards, click the button "Import".
(note that the interface might be a little different from the image below depending on the OS/version used)
Running the DigiPal VM
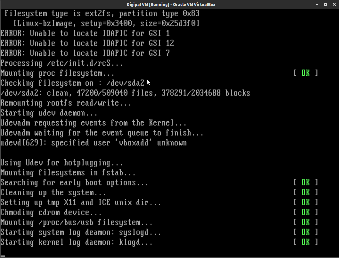
Once installed, the VM should appear in the main page. From there, you can run it by clicking the button "Start" from the menu on the top. A new window should be opened and the VM should start loading. You will be seeing a black screen for a few seconds. That's the VM loading, so do not worry about it. 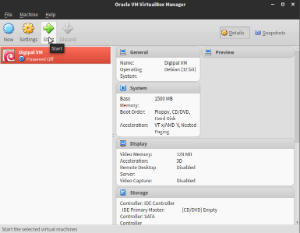
Using your own DigiPal virtual machine
Running DigiPal
The DigiPal VM looks like the image below. As you can see, it is very minimal and the only software installed is the one to run DigiPal, or to edit it.
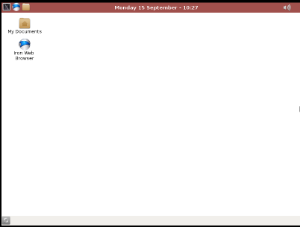
When opening the browser "Iron Web Browser", the page will be automatically point to DigiPal.
Editing DigiPal
(Add link to the editorial section of the documentation)
Closing the VM and saving your work
It is advised to close your VM after each use, or when you are about to turn your computer off. The reason is that the VM state is only saved when you close it. This means that if your computer ever crashed or suddenly restarted while the VM is still open, all your modifications since the last time you opened it would be lost. Snapshots are a way to regularly save your work, see the relevant section below for more information.
To save and close the VM, simply close the VM window (alternatively you can select 'Machine' then 'Close...' in the VM main menu). Then make sure the 'Save the machine state' option is selected and press the OK button.
Advanced Topics
Making backups
If you are editing your own content on the VM and you don't want to loose it, you are encouraged to regularly save your VM. A backup is also called a 'snapshot'. It make an exact copy of your database, your site and the way the VM looks. To backup your VM, click 'Machine' in the VM main menu and select 'Take Snapshot...'. A dialog box pops up asking you for a name to your backup.
Although there is no limit to the number of snapshots you can take, each one takes a lot of space on disk so you have to find a balance between frequency and disk space. Unless you are about to make a large amount of modification you cannot easily undo (e.g. deleting several image records, modifying all your item names) it is safe to leave a week or more between each snapshot.
Restoring a backup
To restore a snapshot, close your VM (add link to above section) if it already open. Then select your VM in the list on the left panel of the VirtualBox Manager. Click 'Snapshots' in the top right corner. Now the right panel displays a list of your snapshots. Click the snapshot you want to restore then click the little 'restore snapshot' icon just on top of the list. In the dialog window, make sure the check box is ticked ('Create a snapshot of the current machine state') then click Restore. Now start your VM, you should see things exactly as they were when you took that snapshot.
Editing DigiPal Source Code
DigiPal is open source and you are free to customise it as you wish. A lot of things can be changed through the setting file (add link to configuring DigiPal).If you need to make deeper changes such as adding new functionality, you will need the help of a software developer. The source code is in the folder /home/DigiPal/DigiPal and can be edited directly while browsing your site. By running the browser at the address http://localhost:8000, you will be able to see the changes you apply. Please not however that if you are responsible to any modification you make to the code. Unwanted changes can can cause bugs and data corruption. Moreover it will be much more difficult for someone to assist you if you are running a patched DigiPal version.For more information about contributing to the DigiPal framework, please see the relevant section (add link).
Upgrading your version of DigiPal
See the Upgrading DigiPal help page.
Giancarlo Buomprisco and Geoffroy Noel